ETL
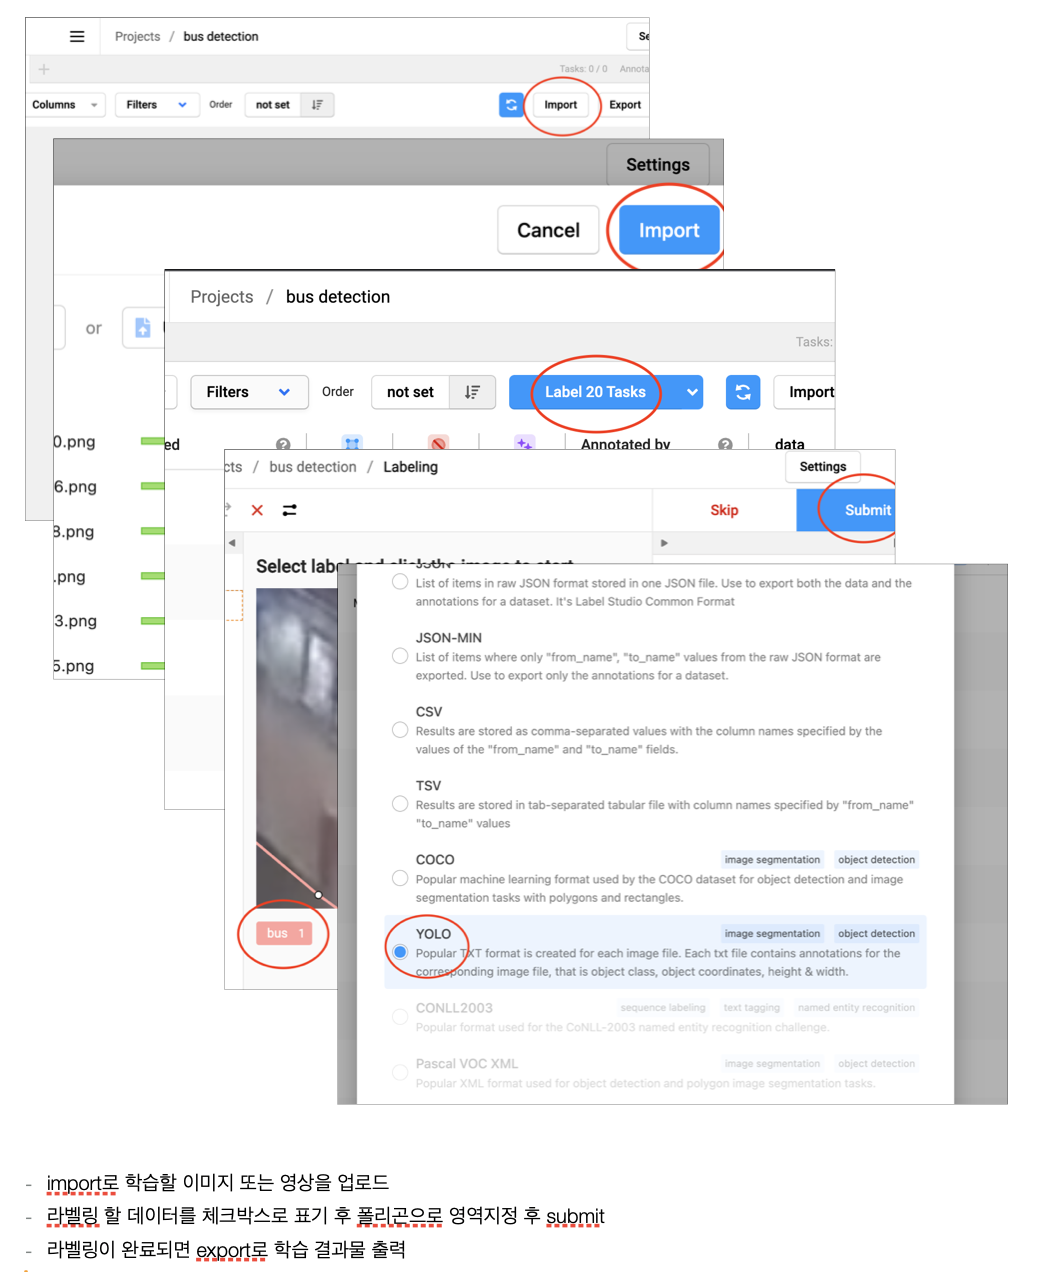
label studio
-
설치
- Anaconda
- Conda create —name detection python=3.8
- Conda activate detection
- git clone https://github.com/JS3322/yolov8_test.git
- 또는 ultralytics만 설치
- pip install -r requirements.txt
- pip install ultralytics
- 설치 : label-studio
- docker pull heartexlabs/label-studio:latest
- docker run -it -p 8080:8080 -v $(pwd)/mydata:/label-studio/data heartexlabs/label-studio:latest —name label_server
- docker start label_server
- Docker container start label_server
- 8080port
- 14.7.83.63 접속설정
- git clone https://github.com/kunintns/segmentation100.git
- pip install labelImg
- labelImg 실행
- openDir : 이미지 폴더 선택
- 우측 하단 이미지 파일 선택
- Yolo 아이콘 선택 : 좌측 중단
- 이미지 중에 학습할 범위 라벨링 드래그
- data.yml 파일생성
- 양식에 맞춰 파일 코드 작성 : train폴더와 val폴더, NC변수와 라벨링 변수배열
- Anaconda
-
segmentation - 학습
- python main.py
- pip uninstall torch
- Pip install Tourchvision (torch 2.0.0과 맞는 0.15.1 설치 필요)
- pip install torch -f https://github.com/conda-forge/pytorch-conda-feedstock/releases/download/v1.11.0/torch-1.11.0-cp39-cp39-macosx_12_0_arm64.whl
- 애플 실리콘일 경우 pytorch arm64버전 설치 및 파이썬 버전 cp39로 설치 필요
- Label 에서 만든 data.yml파일을 불러와서 학습
- pip3 install labelImg
-
Validate custom model
- Yolo task=detect model=val model=<경로.pt> data=data.yaml
-
Interface with custom model
- Yolo tast=detect mode=predict model=<경로.pt> conf=0.25 source=<이미지 폴더 또는 영상>
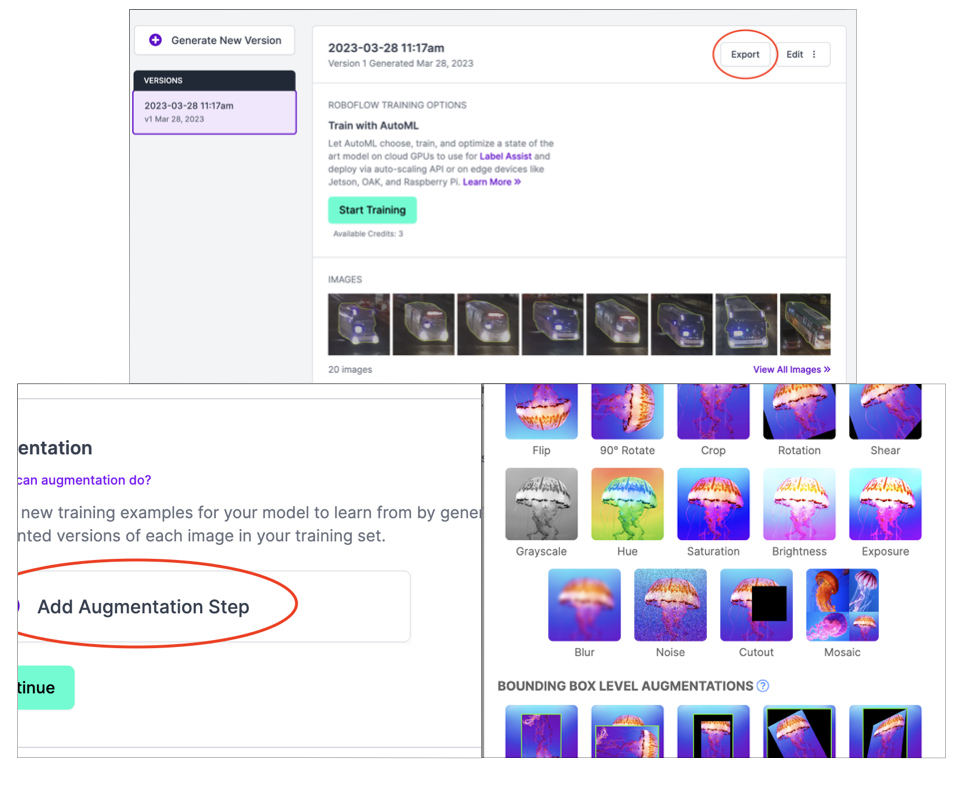
Roboflow
- Roboflow export